Programming Environment Recommendation
I recommend Visual Studio Code (VS Code or Code) as a programming environment. This works in Windows, MACOS, and Linux well. It easily integrated with Python and allows for remote editing, so that we can run programs on our robot. Feel free to use any editor and programming environment you choose, e.g., PyCharm.
Setup
- Here is where you can download VS Code.
- Here are some helpful setup instructions for programming in python.
- Here is a link to install git. VS Code will automatically integrate with GIT.
Running Python
We will run our programs in VS Code. Here are some helpful commands (be sure to replace the filename and hostname appropriately).
- Windows
- To open a terminal in VS Code:
CTRL+` - To run a python program locally in a terminal:
py -3 myfile.py - To run a python program remotely in a terminal:
type myfile.py |
          ssh pi@hostname python3 -u
- To open a terminal in VS Code:
- MACOSX/Linux
- To open a terminal in VS Code:
CTRL+` - To run a python program locally in a terminal:
python3 myfile.py - To run a python program remotely in a terminal:
cat myfile.py |
          ssh pi@hostname python3 -u
- To open a terminal in VS Code:
Using GIT for assignments
We will be using GIT to turn assignments in. GIT is a version control system that allows seemless collaboration when programming in a team. We will use it as a turn-in system so I can easily give you feedback on your code. Note the following for some how-tos with GIT and VS code:
- If this is your first time using git, then open a terminal in VS code and
set your name and email by running (be sure to use your actual full name and
Richmond email):
git config --global user.name "FirstName LastName"git config --global user.email "firstName.Lastname@richmond.edu"
- Before starting each assignment, follow these steps to clone your
repository:
- Accept the link from GitHub Classroom for the specific assignment. This will create a repository for your code that only you can see.
- In VS Code, clone the repository by typing
CTRL/CMD+SHIFT+Pand copying the repository URL into the text bar. Finally select a folder on your computer for the repository. I recommend staying organized and having a collective folder for all of our assignments in this class. - Open the folder in VS Code.
- After editing your folder and completing your assignment (including
editing the Coverpage.txt!) be sure to stage, commit, and push all your
changes so that I can see them:
- On the far left panel of VS Code, click the Source Control button, or
type
CTRL/CMD+SHIFT+G. - To stage changes, click on the
+-symbol for any file which you added, deleted, or modified. - To commit changes, click on the checkmark symbol at the top of the source control panel. In the bar enter a descriptive message for the changes.
- To push changes to GitHub, click on the ellipses at the top of the source control panel and select push. Enter your username and password for GitHub.
- After I have graded the work, I will commit and push alterations to your files and the Grade.txt file in your repository. To get these changes, click the ellipses at the top of the source control panel and select pull. Enter your username and password for GitHub.
- On the far left panel of VS Code, click the Source Control button, or
type
GoPiGo
We will be using the GoPiGo robot platform this semester as a ground robot. We need to ensure everyone has a proper setup for functionality and ability to program the robot for assignments. This is a guide to relevant information on this platform.
Application Program Interface (API) Information and Programming
- The GoPiGos will be programmed remotely, see above on how to run a python program remotely.
- Here is a link to the GoPiGo's API.
- Here is a link to the sensor's API.
Sensor Arrangement and Information
The GoPiGo platform has been set up with the following sensors and actuators:
- Wheels: There are two wheels on the robot which can be operated. Note that the back "wheel" is called a skid. It is not controllable and simply slides on the ground.
- LEDs: There are multiple LEDs that can be set on the robot.
- Distance sensor: A distance sensor measures the distances to whatever is immediately in front of it. The GoPiGo distance sensor has a maximum range of 2.3 meters and will report the measurement in millimeters. This sensor is attached to a servo, so that the sensor can be rotated to get other distance values.
- Light and Color sensor: A light and color sensor will read a color value in RGBA (red, green, blue, alpha) of whatever object is in front of the sensor. The sensor piece also has an LED which can be set to on or off.
- Line Follower sensor: A downward facing line sensor is attached to the robot. This sensor reads the "color" of the floor. It will only recognize white and black, however. It is a set of 6 individual sensors, whose data can be individually accessed.
- Inertial Measurement Unit (IMU): An IMU measures the position, velocity, and acceleration in a given frame of reference. It includes orientation reading as Euler Angles, a magnetometer reading the strength of a magnetic field, a gyroscope reading angular velocity, and an accelerometer reading accelerations acting upon it. Additionally, this sensor has a temperature measurement in Celsius. Important, this sensor needs to be calibrated each time the robot turns on.
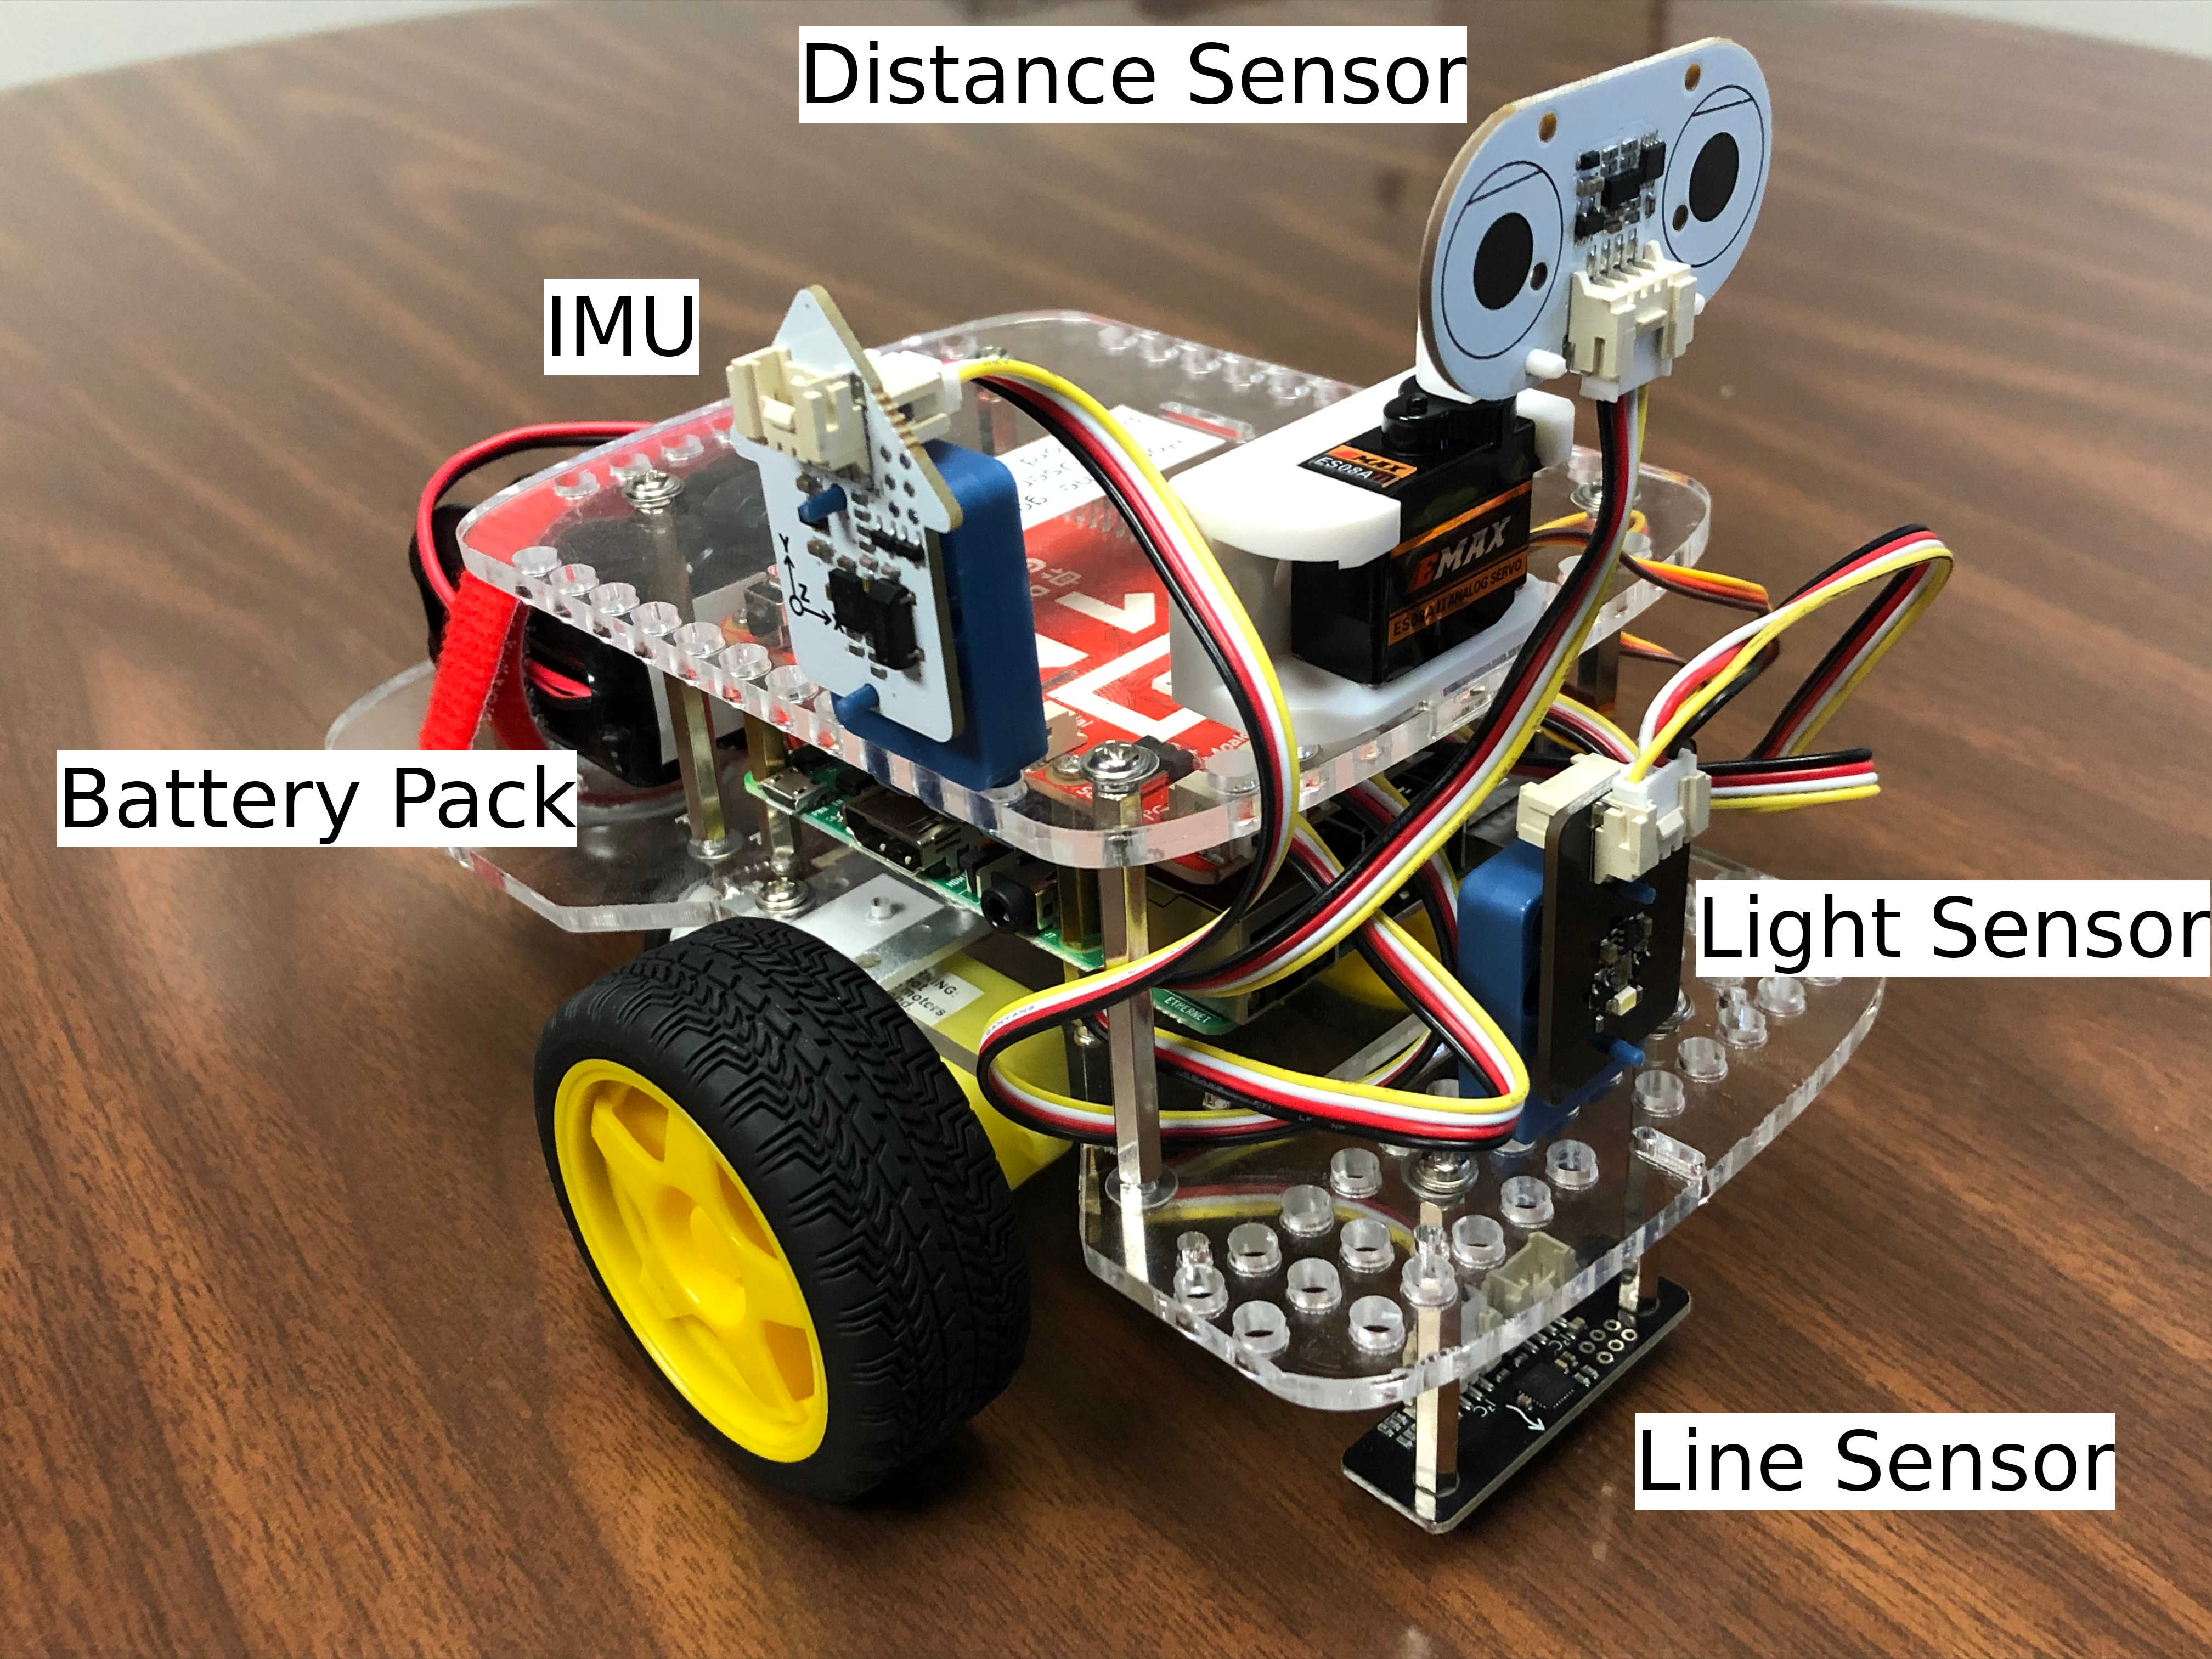
Isometric View |
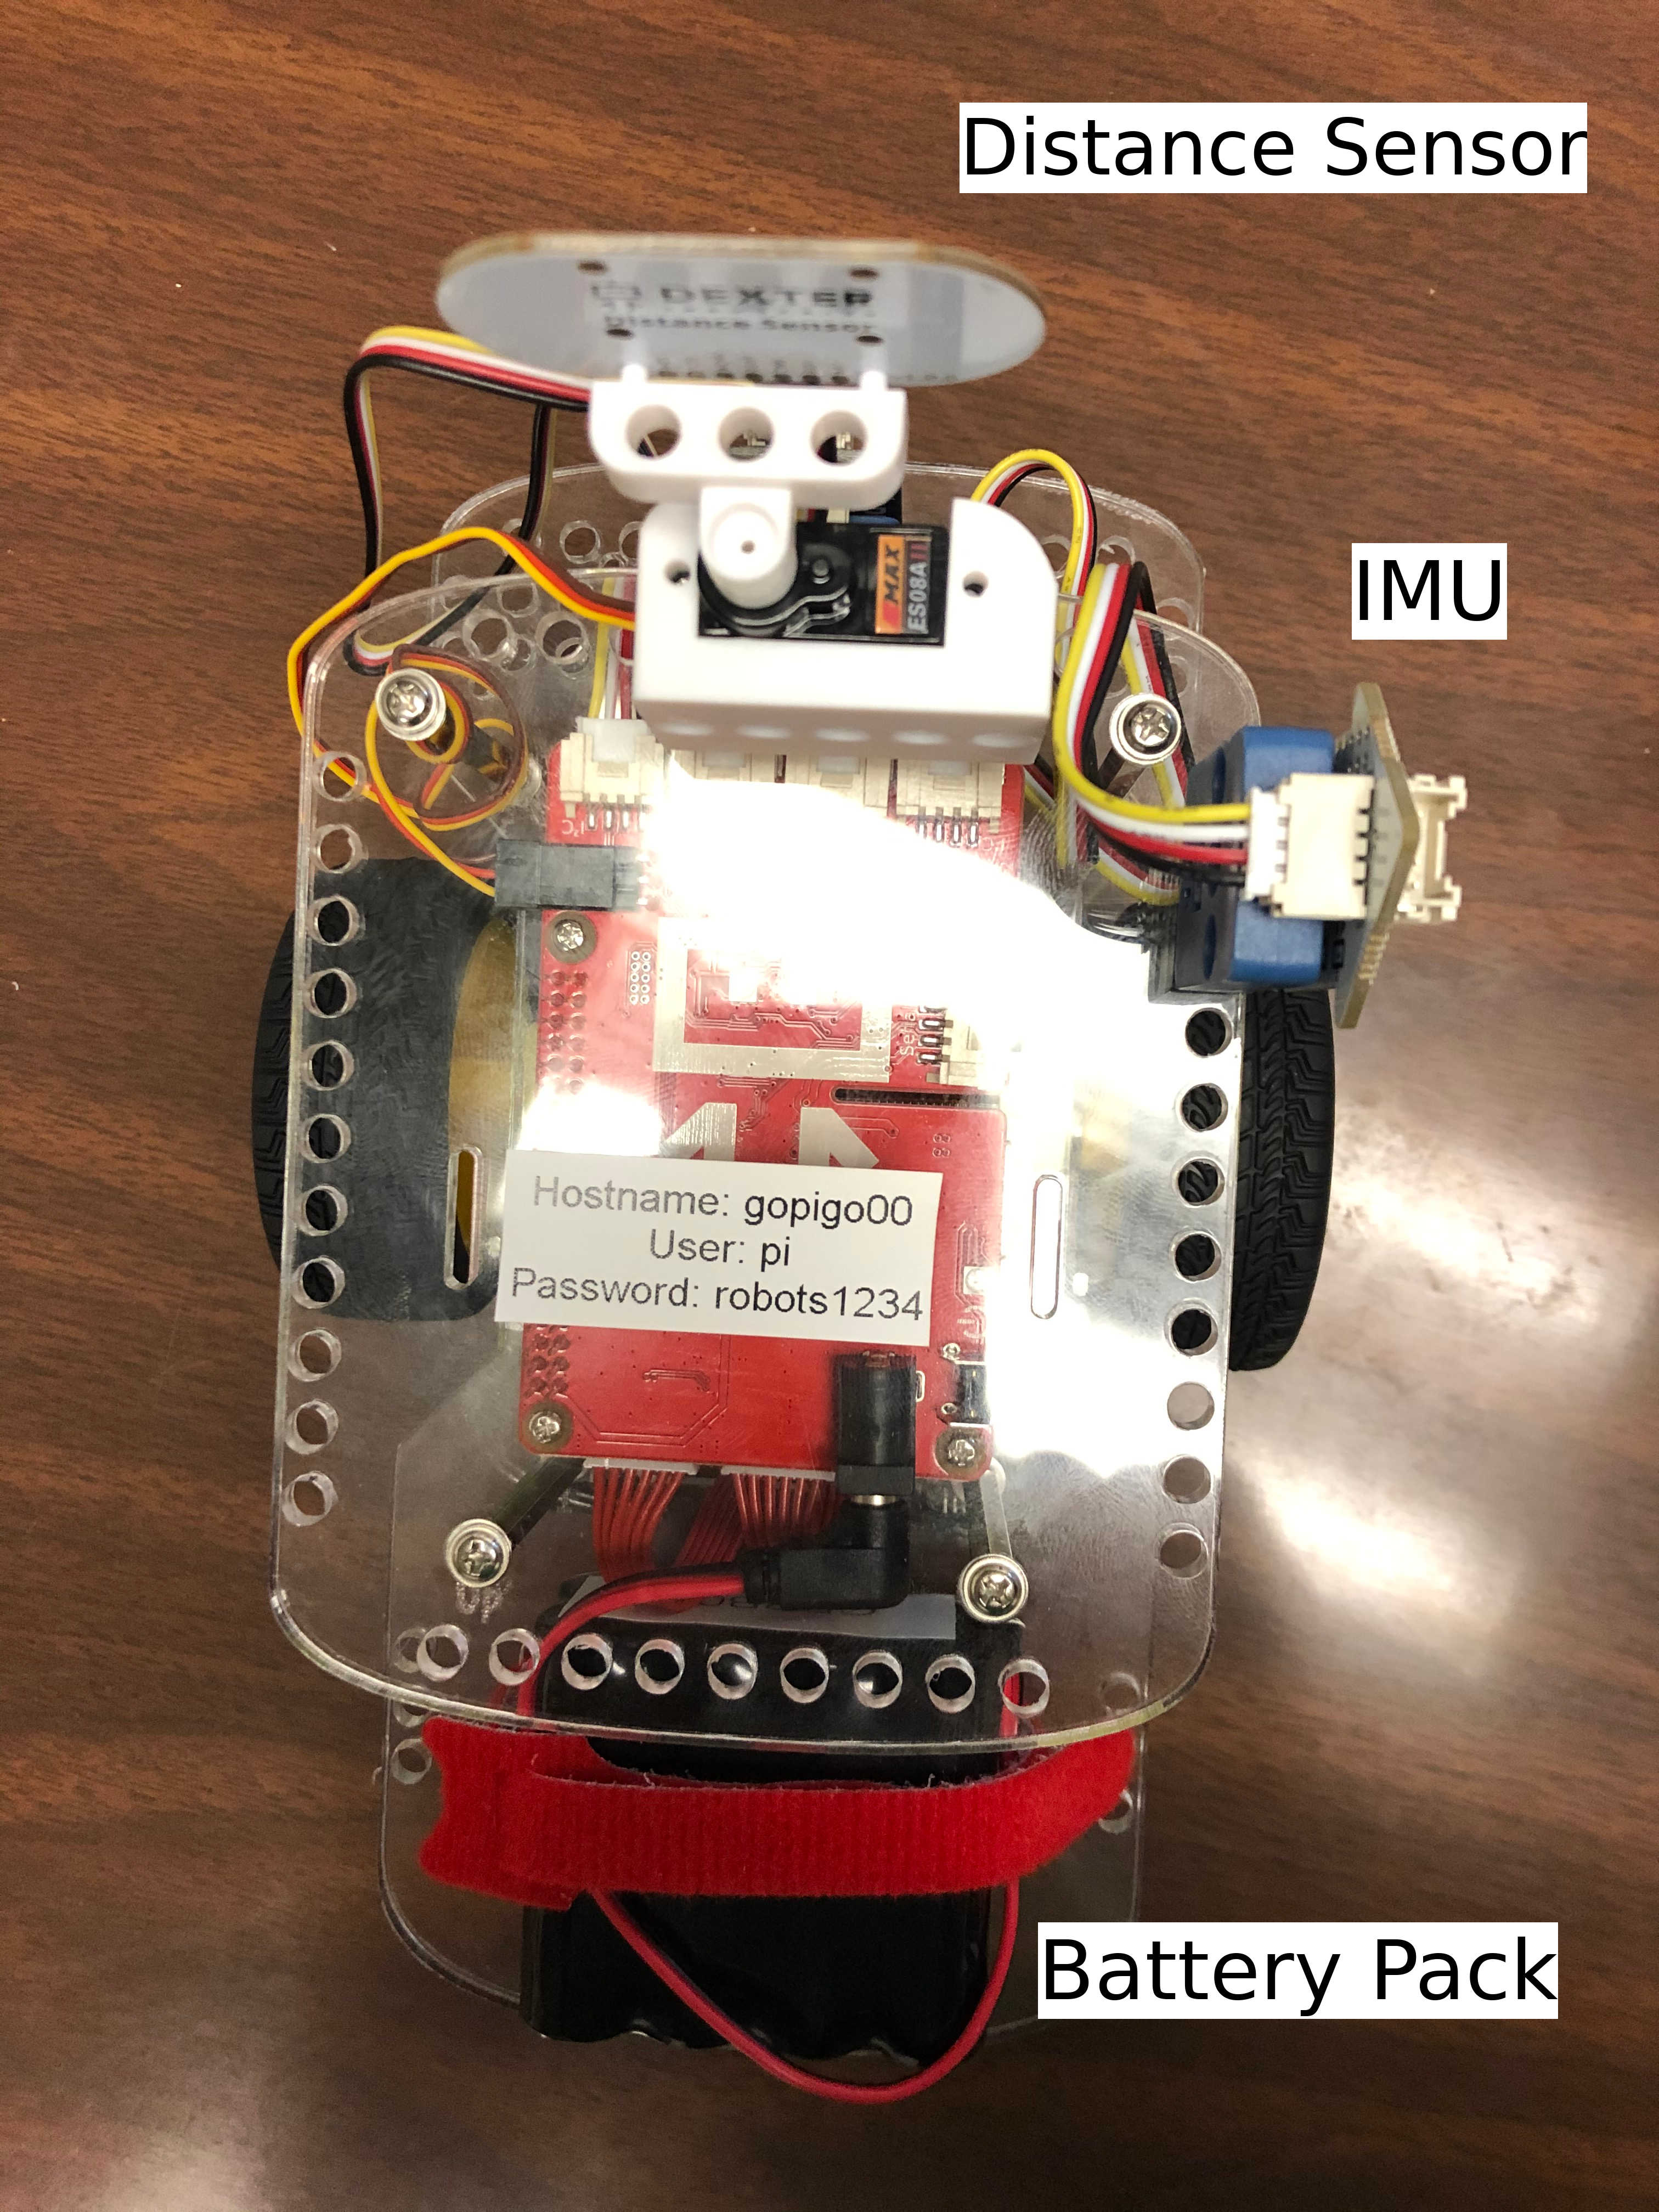
Top View |
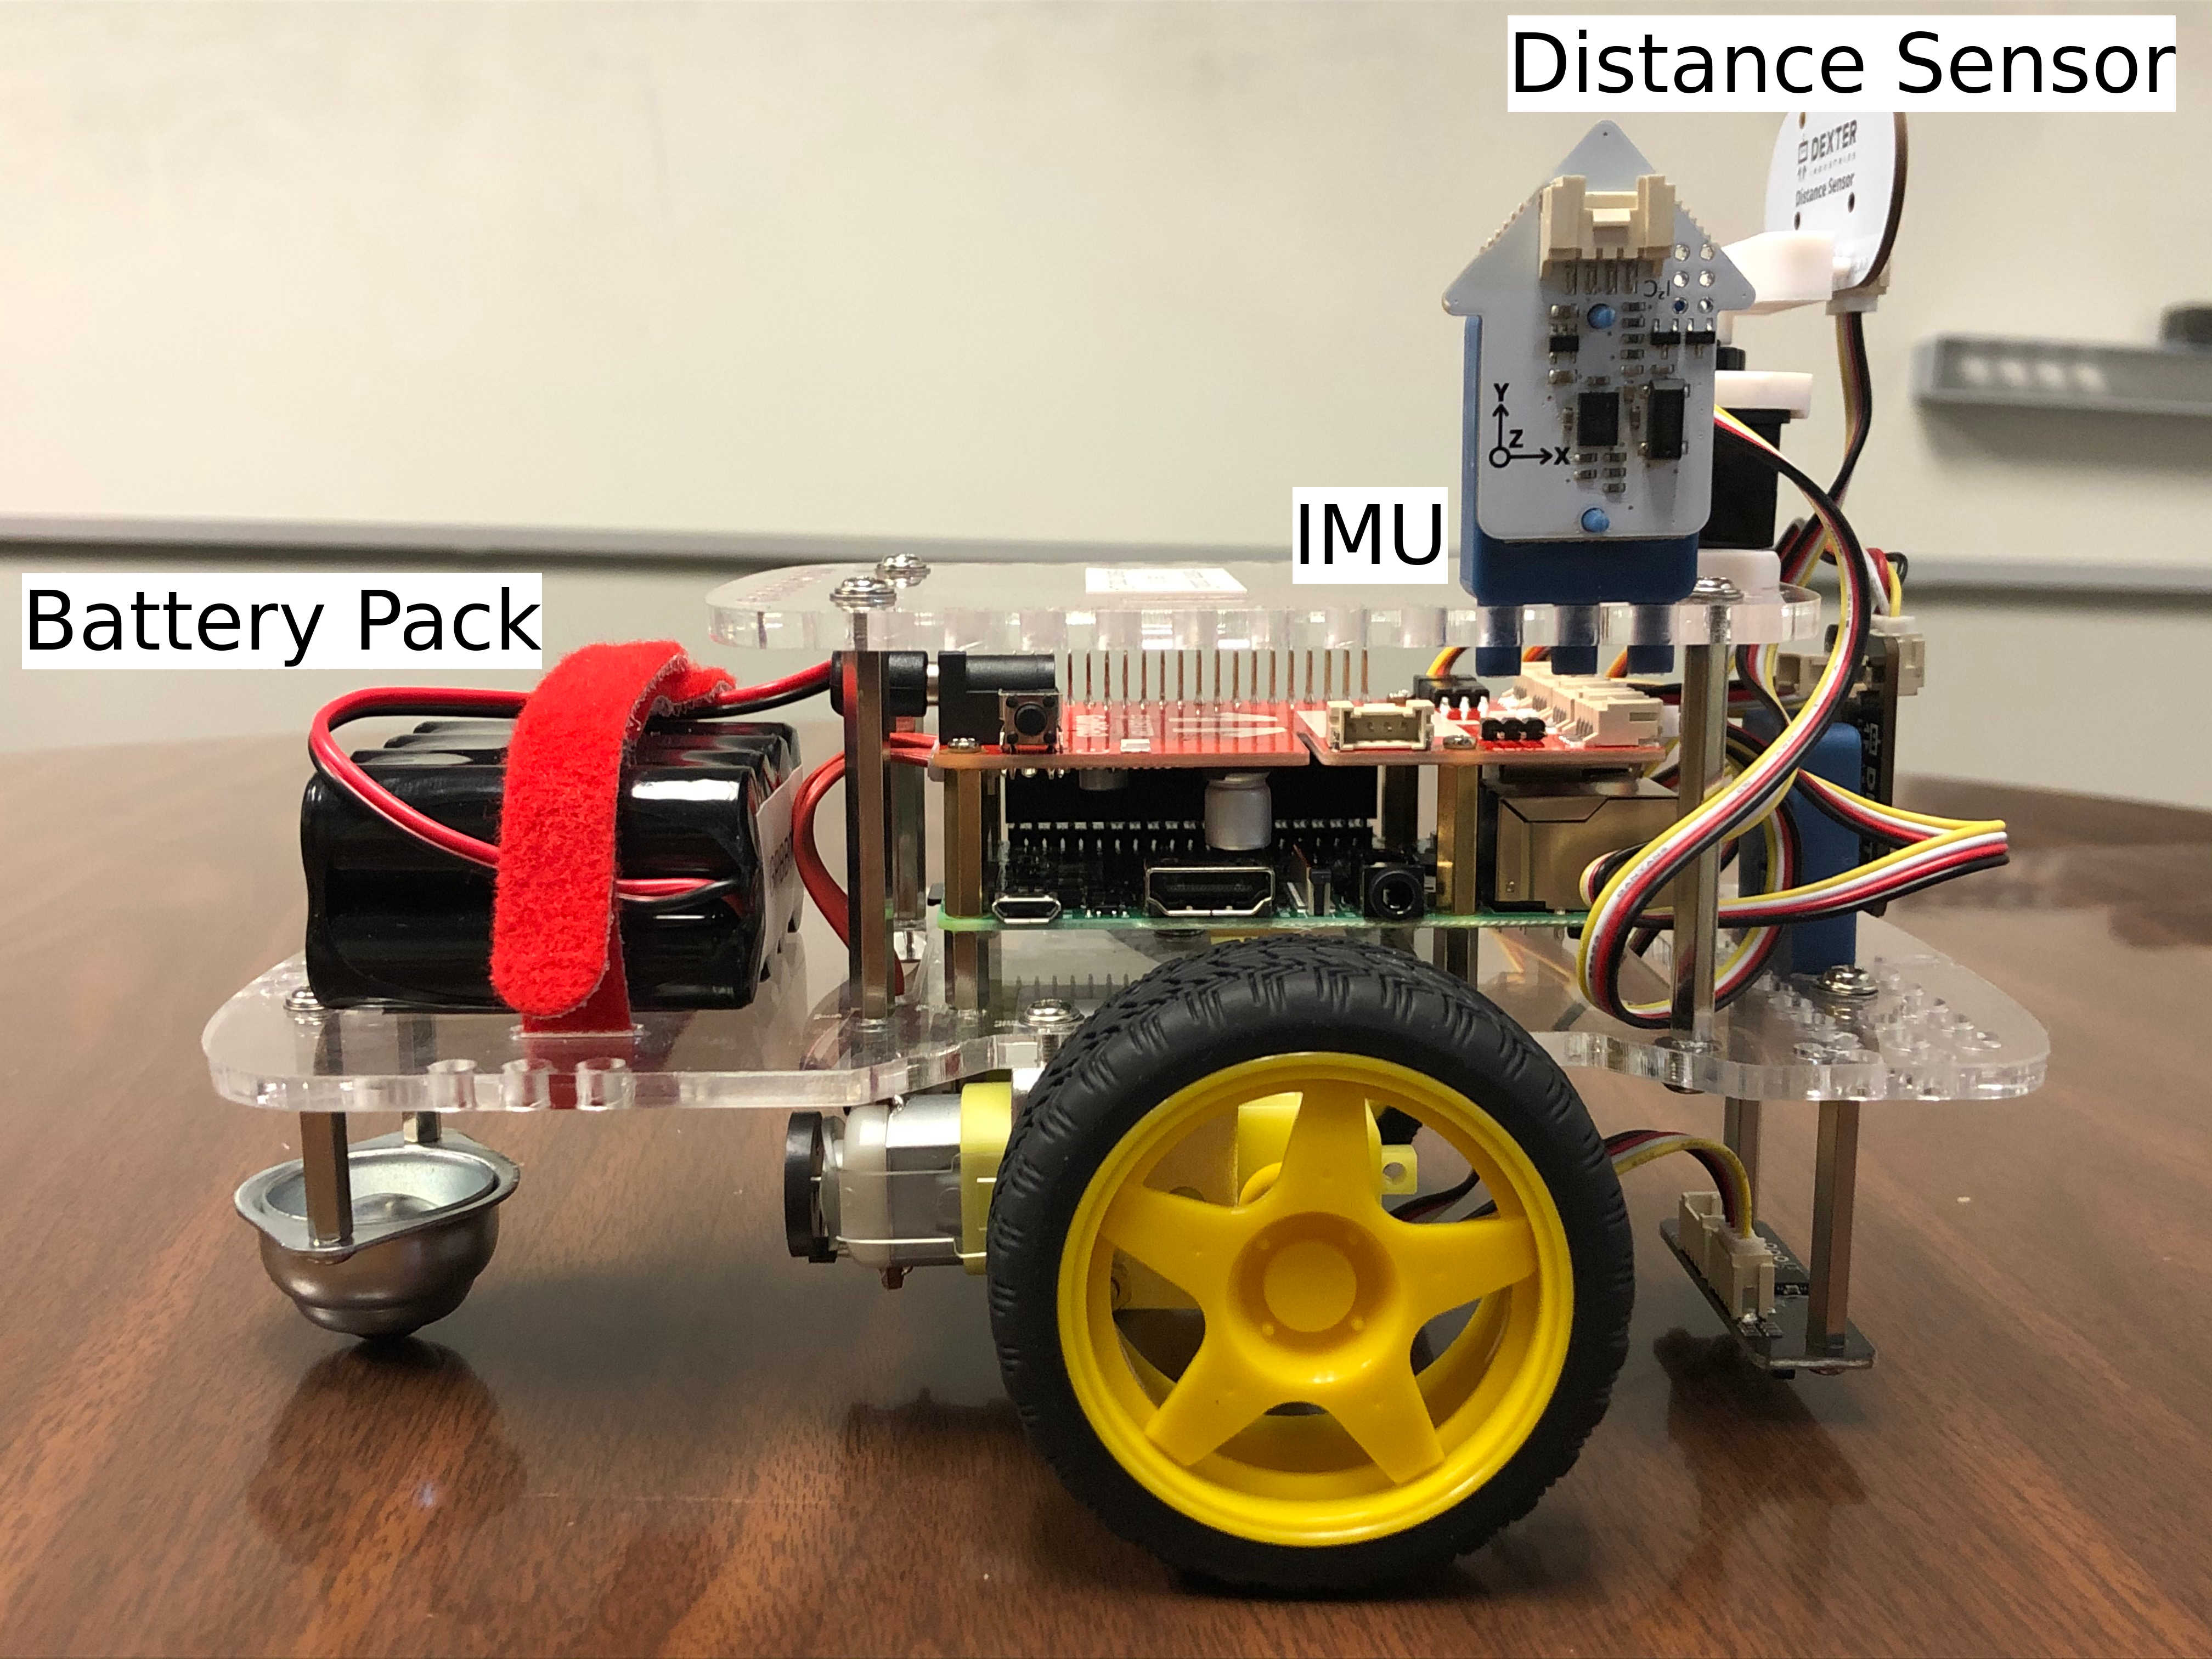
Side View |
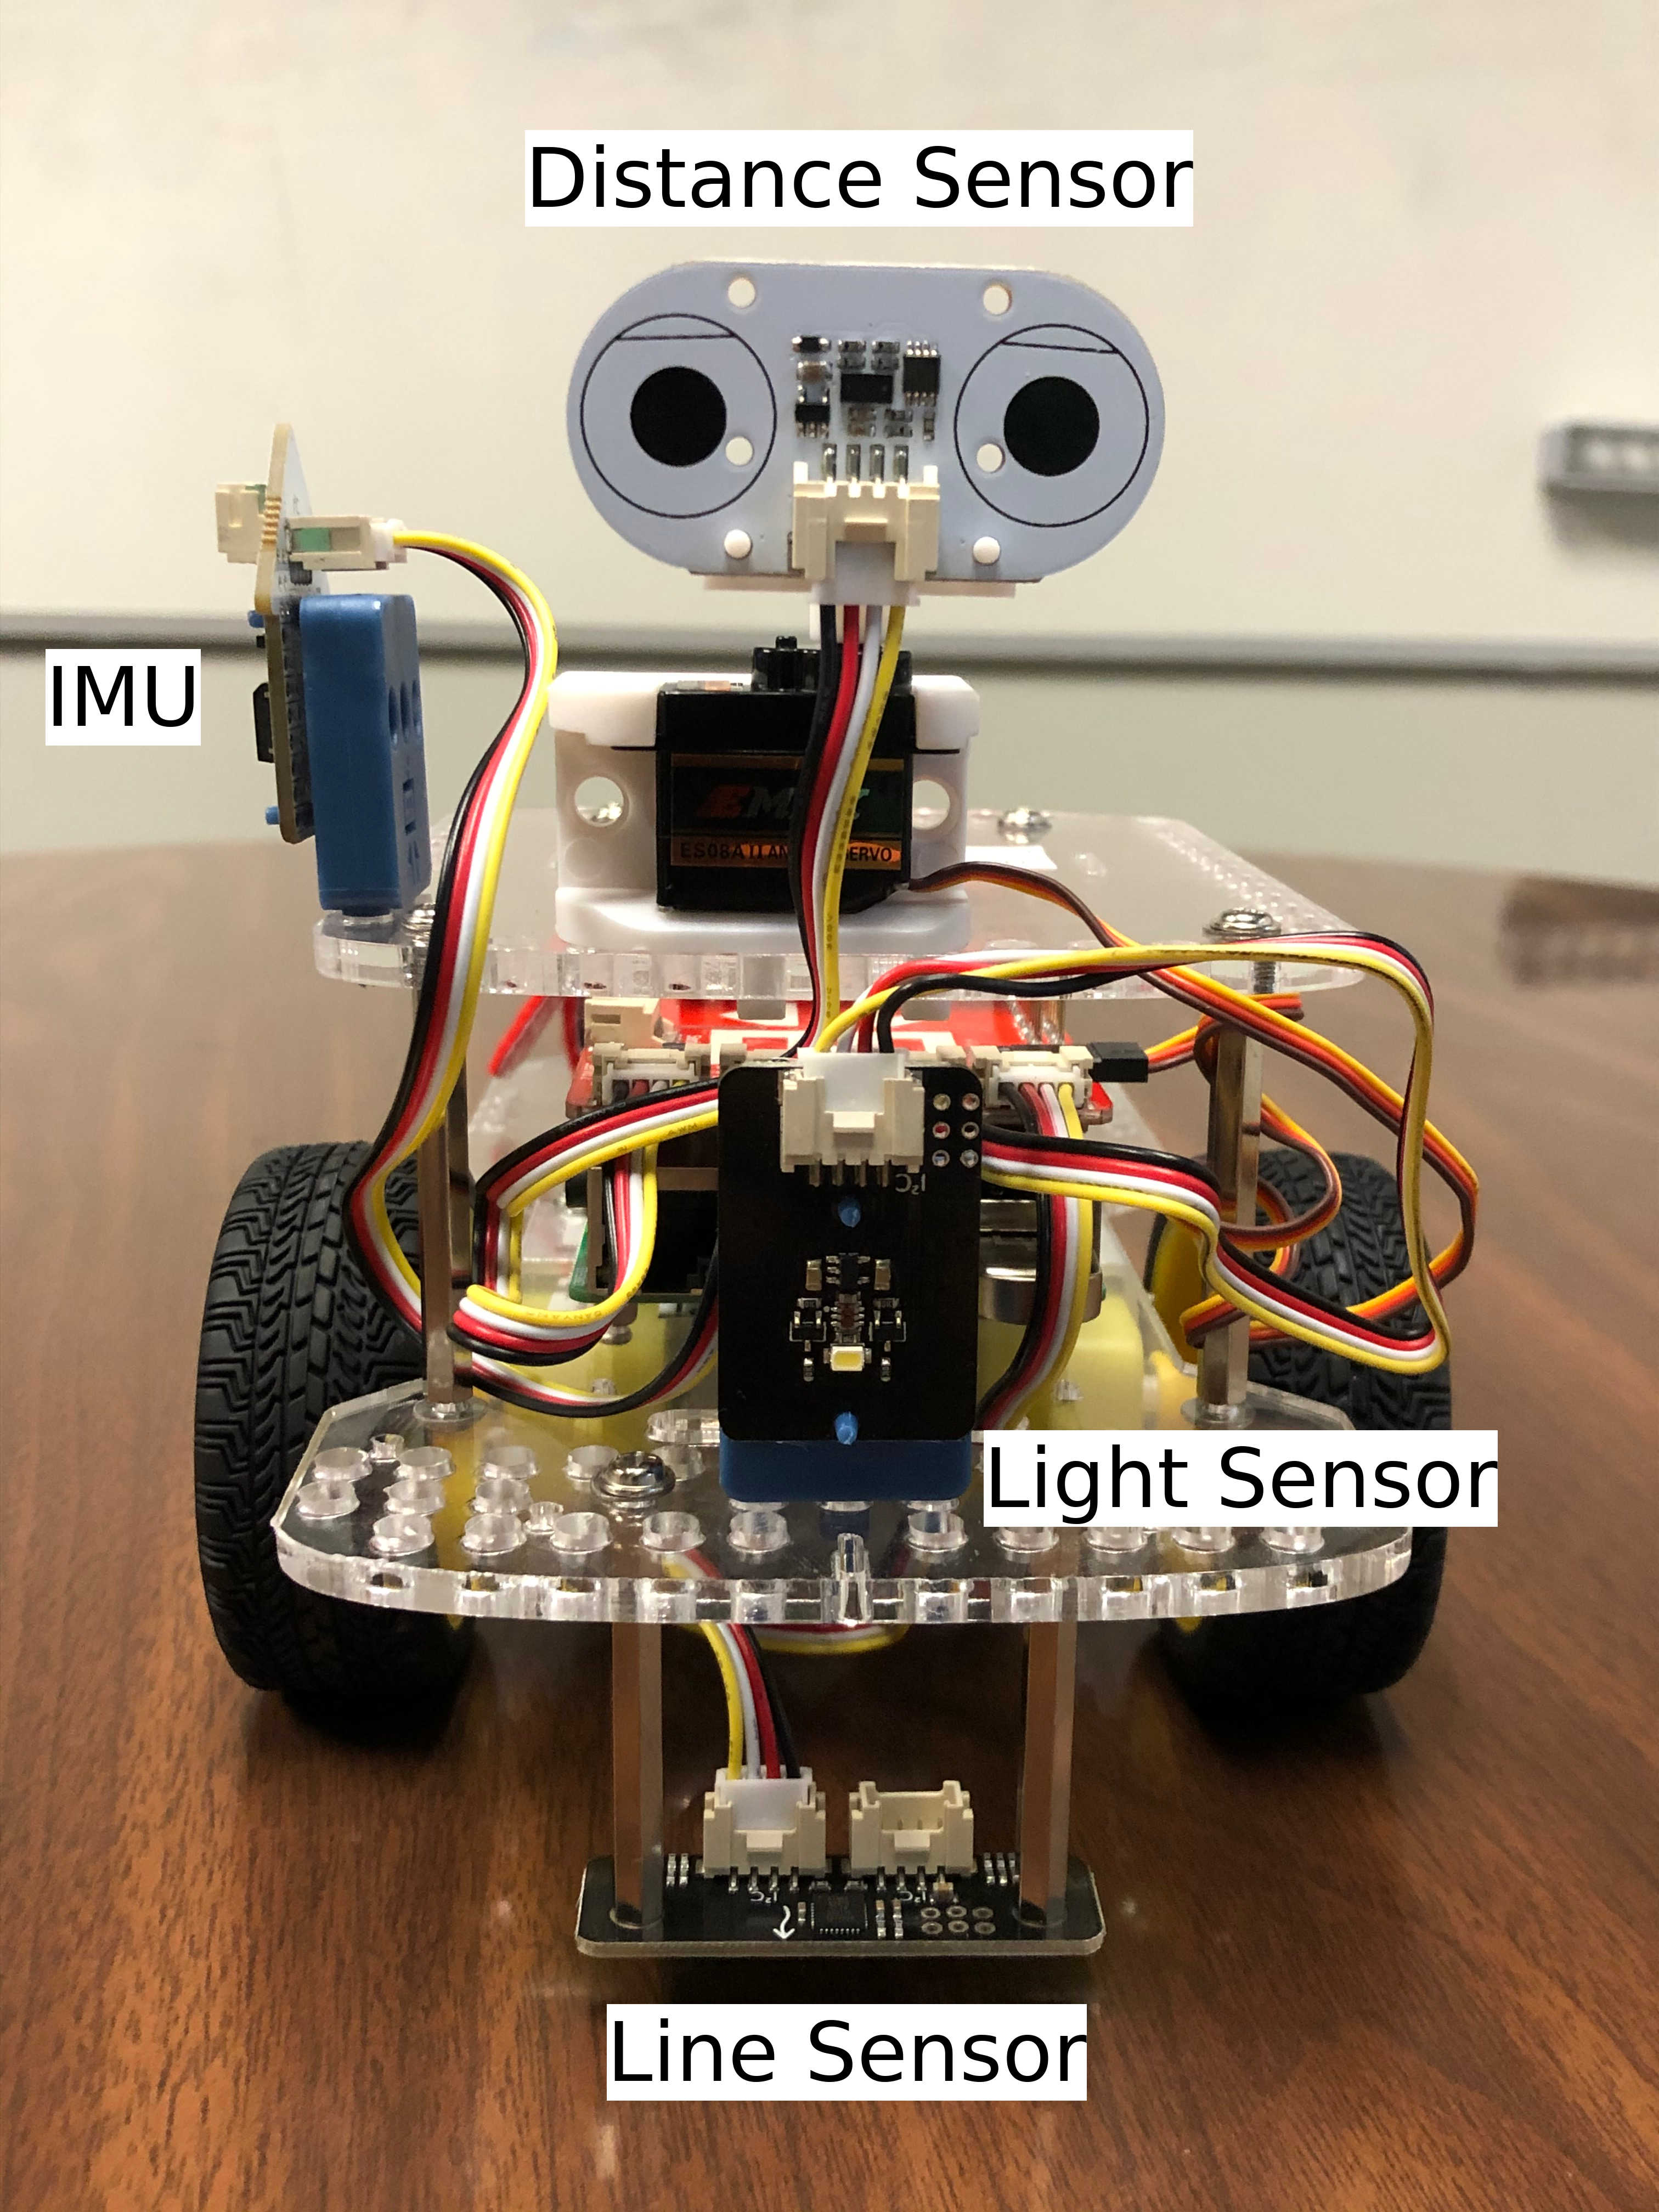
Front View |
CoDrone