Getting Started with Mathematica
Contents:
- Obtaining a Mathematica notebook.
- Opening a Mathematica notebook.
- Typing and executing commands in a Mathematica notebook.
- Saving a Mathematica notebook.
- Selecting part of a Mathematica notebook to print.
- Printing a Mathematica notebook.
- Closing a Mathematica notebook.
Obtaining a Mathematica notebook.
- Mathematica notebooks are obtained from Blackboard, which is a password-protected webspace, located at https://blackboard.richmond.edu. To obtain a particular notebook, follow the instructions on the page you see when you click here.
Opening a Mathematica notebook.
- To open the notebook, double-click on the Mathematica notebook (the copy you saved in your Netfiles account) you wish to open. Then, wait patiently. The notebook will eventually appear, as will a menu bar (across the top of the screen), and one or two smaller windows, making your screen look something like this:
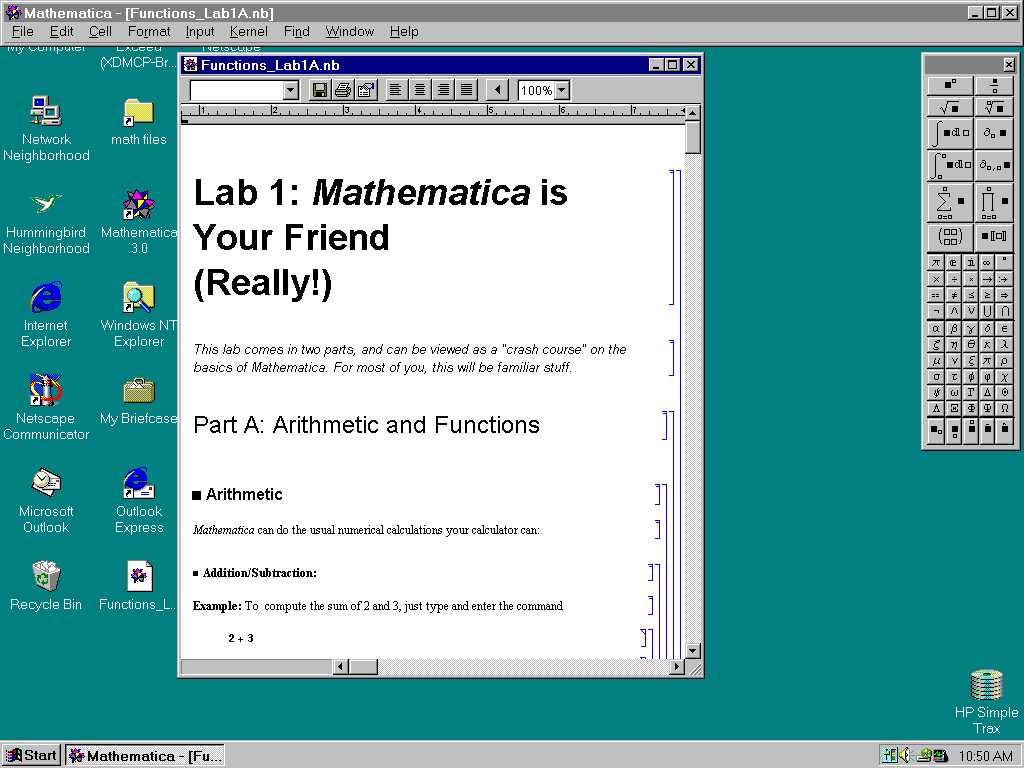
- See below on how to use use this Mathematica notebook.
Typing and executing commands in a Mathematica notebook.
- Scrolling:
Move up and down the page with scrollbar or arrow buttons, located along the right edge of the notebook.
- Cells:
Everything in the notebook is grouped by square brackets along the right margin of the notebook. These groupings are called ``cells". There are three types of cells:
- Text cells:
Filled with insightful commentary on the subject matter:
![]()
- Command cells:
Actual commands to be entered into Mathematica:
![]()
- Output cells:
Mathematica output from entered commands:

- Typing a command:
Place the cursor between two cells so that the cursor turns horizontal. Then click the left mouse button to make a long horizontal line appear between the cells. Now, whatever you type will appear where this line is.
- Entering a command:
Place the cursor anywhere within the cell containing the command, and click the left mouse button. This will place the blinking cursor in the cell. Then, press the ``Enter" button (located at the lower-righthand corner of the keyboard, where the numerical keypad is). This will enter all the commands in that cell. (NOTE: If you prefer to use the "Enter" key that is closer to the letter keys, you must hold down the "Shift" key while pressing this "Enter" to execute a command. Pay special attention to this issue - its important!) Once the commands have been processed, Mathematica will assign a number to the entered command:
![]()
If the command cell produces any output, it will also appear.
Saving a Mathematica notebook.
- Click ``File" at the top of the notebook, then click ``Save" on the resulting submenu. It is recommended that you save your notebook often, even if you are not finished working yet.
Selecting part of a Mathematica notebook to print.
- Notice that there are various square brackets along the right-hand side of the notebook. This allows you to select only a portion of the notebook for commands such as Print. When you have chosen a portion (usually the Exercises section) of the notebook to print, locate one of these square brackets that encloses the portion you want, then click once on this square bracket. This will fill the bracket in with a tall skinny black box. (This is called selecting or highlighting the bracket or cell.) Once this is done, you are ready to print the selected part of the notebook.
- NOTE: If you print without selecting a bracket first, the entire notebook will print, which, if unintended, is a waste of paper. Remember, each student has a limit on the number of pages printed before additional charges are made to the students accout.
Printing a Mathematica notebook.
- Click ``File" on the menu bar along the top of the screen, then, on the resulting submenu, click ``Print" if you are printing the entire notebook, or click "Print Selection" if you are printing only the portion you have highlighted (see Selecting part of a Mathematica notebook to print, above). A small window, which looks like this, will appear:
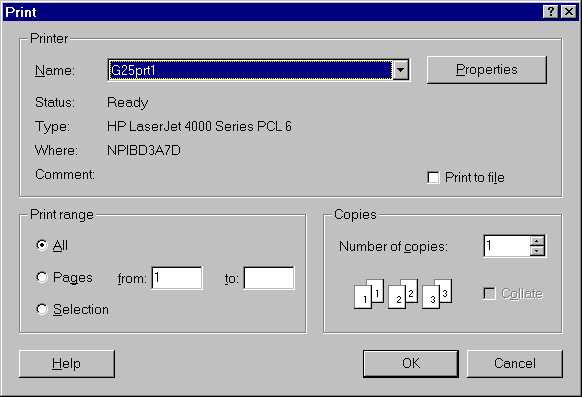
- Make sure that the "Name:" field says "G25prt1". If it says something different, click the small arrowhead box at the end of the "Name:" field. Select "G25prt1" from the resulting menu of choices.
- Click on the ``OK" button at the bottom of this window. The window will disappear and your printout will magically appear at a nearby printer.
Closing a Mathematica notebook.
- Click ``File" at the top of the notebook window, then click ``Quit" on the submenu.